

It’s not as difficult as it appears to replace a toilet. All you’ll need are a few hours, a helping hand, and the necessary tools and toilet components. Choose your new toilet and, if you replace a toilet, make sure you have plumbing ready for the new installation before you start learning how to install a toilet.
Step By Step Process To Replace a Toilet
- If you replace a toilet, you’ll have to take out the old one first. The following is a step-by-step guide to replace a toilet and installing a new one:
- Turn off the water at the shut-off valve near the toilet, which is either on the wall or on the floor.
- To drain all the water from the tank and toilet bowl, flush the toilet. Plunge any remaining water down the drain line with a plunger. Remove any remaining water from the tank with a sponge and a bucket while wearing rubber gloves.
- Using an adjustable wrench, disconnect the supply line. It may be difficult to loosen one or both connection points if the line has never been disconnected or has been connected for a lengthy period. If this is the case, break down any corrosion with a heavy-duty lubricant.
- Keep a pail and cloth handy to capture any water that leaks from the supply line and wipe it up.
1. Inspect The Toilet Flange
It’s crucial to evaluate whether you need to repair the toilet flange before answering “How to replace a toilet?”
- The flange connects the toilet to the drainpipe in the floor and serves as a connection point for the toilet’s hardware. If the previous toilet’s flange and bolts are in good condition, they can be reused to replace a toilet. Replace it with a matching flange if it is cracked or damaged.
Important: If you’re not sure what type of replacement flange to choose, take a photo of your old one to identify the goods that are comparable.
2. Install A New Seal In The Toilet
To replace the new toilet seal or wax ring, you have two options:
- To protect the floor and the toilet, place the new toilet bowl on its side on a padded surface and attach the replacement seal to the bottom of the bowl. This method has the advantage of ensuring that the ring is in the appropriate position when the toilet is placed over the flange.
- Alternatively, before lowering the bowl into place, set the seal on the flange.
Important: If your bathroom has been updated with thick tile since the toilet was built, you may require a thicker toilet seal or wax ring.
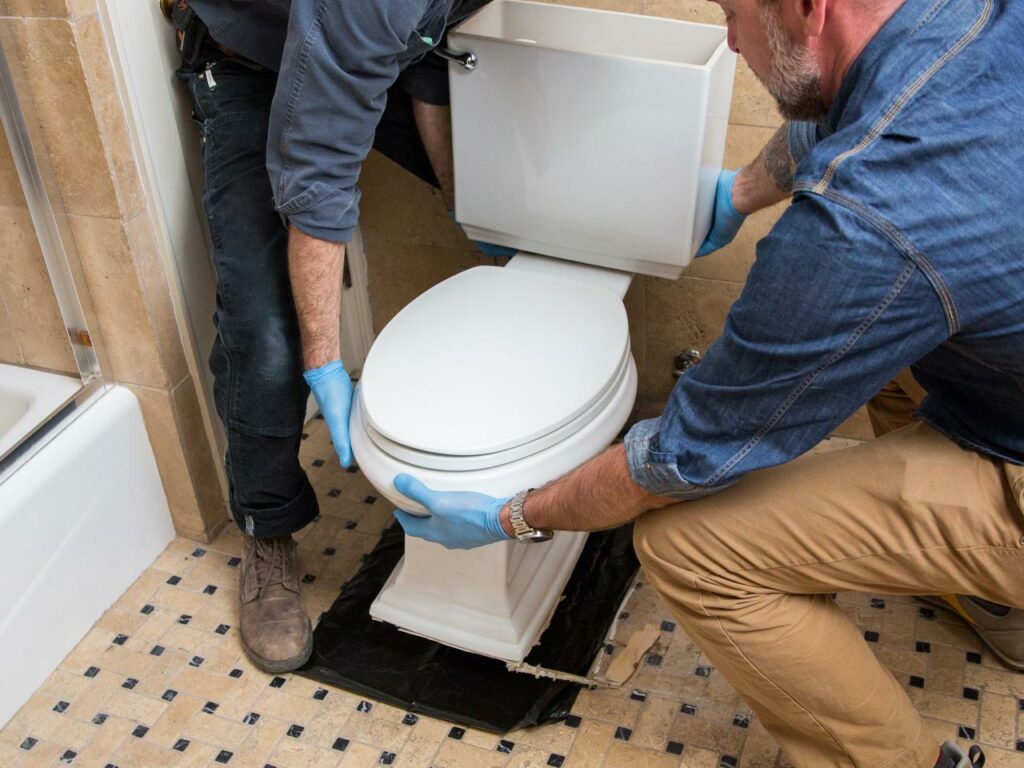
3. Place The Toilet On Flange
You’re ready to learn how to replace a toilet now that you’ve removed the old toilet and prepared the area.
- Attach the toilet bowl to the flange by aligning the bolt holes in the bowl’s base with the flange’s bolts.
- If it helps, grasp the bowl by the inside rim rather than the outer borders as you lower it to have a better grip and more control.
- To set the seal, press down.
Important: After installing the toilet seal or wax ring on the flange, be careful not to move or tilt the toilet, as this could break the seal and cause subsequent leaks.
4. Bolt The Toilet To The Floor
- Each toilet bowl bolt should have a washer and nut on it, and the nuts should be tightened uniformly.
- As you tighten the nuts a little at a time, alternate from one side of the toilet to the other. Don’t overtighten the nuts or the porcelain bowl will fracture.
- Cut off the surplus bolts with a hacksaw if they extend too far above the tops of the washers and nuts.
Important: Caulk should not be used around the base of a new toilet. The caulk will trap the water under the toilet in the event of a leak, causing major damage to your floor.
5. Attach The Tank
- You’ll need to join the tank and the bowl if you have a two-piece toilet. Because the bowl and tank are permanently joined on a one-piece toilet, you may skip this step.
- Install the “tank to bowl” gasket onto the base of the flush valve if it isn’t already there. From the inside of the tank, insert the tank bolts and washers.
- Place the tank on top of the bowl, matching the bolts’ shanks with the bowl’s holes. Cut off the surplus bolts with a hacksaw if they extend too far beyond the washers and nuts.
- Alternately tightening each tank bolt until the tank pulls down and meets the bowl secures the tank to the bowl.
- Reconnect the supply line to the exposed piece of the fill valve that protrudes from the tank’s bottom, as well as the supply valve that protrudes from the wall or floor.
6. Place The Toilet Seat And Lid On The Toilet.
- The next stage in the toilet installation process is to select a toilet seat. Because there are so many different varieties of toilet seats and lids, be sure you get one that suits your toilet model, before you replace a toilet.
- Because they are more comfortable, elongated toilet seats are the most popular. Round toilet seats are more likely to be found in tiny homes and apartments with limited room.
- By measuring your new toilet, you can determine the correct toilet seat size.
- A customised component, such as an elevated or heated toilet seat, might require specific installation before you replace a toilet.
7. Look For Leaks
Now that the toilet is in place, it’s time to check for leaks.
- Turn on the water shut-off valve slowly and let the tank fill.
- Focus on the base of the toilet and the spot where the tank and bowl connect when flushing.
Important: Add a leak-detecting dye to make it easier to see leaks.